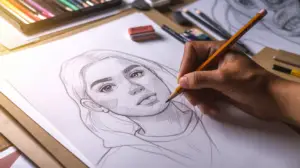
How to draw a portrait in pencil

What tools needed to draw a portrait?
Yes, you get it, drawing a portrait in pencil, you don’t need a tons of tools.
Each pencil portrait requires very few materials and can be learnt by almost everyone. For starters you’ll want some graphite pencils from soft (B) to hard (H) grades, H2 for the lightest part of the drawing and 2B for darkest are recommended.
These different grades give you a range of tones and textures to work with in your portrait.
A nice sketchpad or artpaper will be a necessity. Choose paper with a smooth surface that can withstand repeated erasures without tearing. You’ll also need erasers – a kneaded eraser to lift light marks and a vinyl eraser for stubborn lines.
And don’t forget sharpeners to keep those pencils in top shape. If you are doing shading , a blending stump (or tortillon) will make your shaded areas more homogeneous and save you some effort in between.
I strongly recommend using a drawing board or a clipboard to support your work. Now, With the basic materials you have, you are all set to get started with drawing portraits. Keep in mind that, in addition to having the right tools, practice and patience are the real magic of mastering portrait drawing.
How to Step-by-step guide to drawing a portrait in pencil

Plan with thumbnails
Getting Started on Drawing Your Portrait — Thumbnails These quick sketches allow you to experiment with other layouts and perspectives before finalising the design. Try out different head placements, light sources, and facial expressions to discover the most visually appealing option.
Plan out the head
After deciding on the thumbnail you like the best, you now can design the head structure.
Start with the first sketch round shape (oval) for head. Next up, take guidelines to sketch the locations of the essential face features:
- A mid line horizontal cut for the eyes
- For symmetry, a vertical line down the middle
- A second horizontal line for the nose approximately halfway between the top of the eyes and the bottom of the chin
- Add another horizontal line for the mouth, between the nose and the chin
Make an initial drawing
Based on that, outline the fundamental structures of the face. At this stage your lines will be light and loose. Concentrate on the general shapes and positions of eyes, nose, mouth and ears. Forget about details for now; just go for a rough resemblance.
Introduce tone
- Add some simple shading to provide depth and dimension to portrait drawing
- Figure out where the light source is, and map out the dominant areas of light (and shadow)
- With gentle, even strokes, establish a base layer of tone over the face, leaving the lightest areas blank.
Push the shadows
- Darken the shadows to achieve contrast and shape.
- Focus on places such as the eye sockets, underneath the nose and under the chin (the idea being that these are places where little things hide).
- With these shadows start to darken these areas, and develop softer edges so it’s slightly lighter in the middle and really dark in the corners for transitions.
If you follow the step-by-step guide in this post, you will improve your skills, and you will create better likenesses of people.
10 Rules of Pencil Portrait Drawing That Improved My Skills
- begin with basic shapes, pay attention to proportions, and add details as your portrait comes alive.
- In practicing, draw fewer fully rendered portraits and more simplified, less detailed portraits — it develops essential construction skills versus just developing your rendering skills.
- The rough stuff — the beginning stages of drawing (gesture and construction) — is much more difficult to learn than rendering details, but it is what gives your work confidence and authority.
- Instead of trying to use somebody else’s method, find a technique that aligns with your individual style and goals.
- Watch out for those who tell you that there is only one correct way to draw; they are probably trying to sell you something.
- When doing portraits, simplification is everything — knowing what to exclude is just as important as knowing what to include.
- Working from life is best but photographing references is fine when life models aren’t available.
Some artists work strictly from observation and others supplement their skills with knowledge of anatomy — both have their merit. - You need to achieve progress, and that depends on keeping a healthy sense of dissatisfaction, a constant striving to improve your work, even if this allows you to still enjoy your art.
- Be objective about your work and open to criticism — you’ll learn more from critical feedback than from compliments.
- Drawing skills take time to develop — patience is key since the progress is often slow.
Keep you practicing and developing your technique, but don’t be afraid to experiment different types and styles. Every portrait that you paint will be a step towards developing your skills of observation.
Please share your experiences similar to this blog & how did you overcome it?